
OAuth2 Authentication in Keycloak for Public Clients
Introduction
Authentication is a crucial aspect of web development, ensuring secure access to protected resources. Keycloak, an open-source Identity and Access Management (IAM) server, provides a robust and secure authentication mechanism using the Authorization Code Grant Type with Proof Key for Code Exchange (PKCE). In this article, we’ll focus on how web developers can initiate the authentication flow from their web applications using this method. It covers all the parameters required to kickstart the authentication process, as well as how to generate these parameters.
Authentication for Public Clients
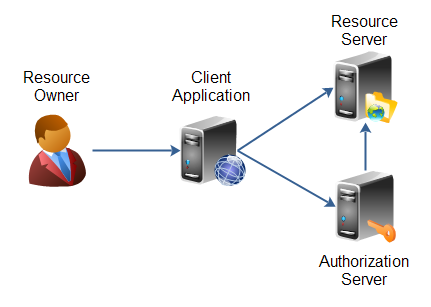
Web and mobile applications are considered as public clients and it is unsafe to embed client secrets in these applications. The Authorization Code Grant Type with PKCE is a secure authentication flow designed for public clients that cannot securely store a client secret. It eliminates the need to embed the secrets in the client applications. It introduces an additional layer of security by using dynamically generated secrets. Below are the steps needed to initiate the authentication flow.
Step 1: Client Registration
Before initiating the authentication flow, the web application must be registered as a client in the Keycloak server. During this registration, you’ll receive a unique client_id that identifies your application. You can also set up a redirect URI where the application will receive the authorization code from Keycloak. Application should implement the logic to handle the code and the subsequent auth flow on the redirect uri.
How to Register a Client in Keycloak
- Log in to the Keycloak Administration Console.
- Navigate to the specific realm where your application will be registered.
- In the left sidebar, click on “Clients.”
- Click the “Create” button to create a new client.
- Provide a name for your client and configure other settings, including the client’s redirect URI.
- After saving the client configuration, you’ll obtain the
client_idthat your application will use.
Step 2: Initiating Authentication
With the client_id in hand, your web application can start the authentication flow by redirecting the user’s browser to the Keycloak authentication endpoint. This redirection should include a series of parameters in the URL, such as the client_id and a dynamically generated code_challenge.
Parameters for Initiating Authentication
response_type: Set this to “code” to specify the Authorization Code flow.client_id: Your application’s client identifier.redirect_uri: The URL where the application will be handling the authorization code from Keycloak.scope: Define the scope of the access, such as “openid” for OpenID Connect and any other scopes the application desires.state(optional): A random string to protect against Cross-Site Request Forgery (CSRF) attacks.code_challenge_method: Set this to “S256” for PKCE.code_challenge: A dynamically generated code challenge derived from the code verifier (more on this in the next step).
How to Generate the code_challenge
- Generate a random string, known as the
code_verifier
The code verifier should be a random string with a minimum length of 43 characters and a maximum length of 128 characters. You can use a cryptographically secure random generator to create this value. Below is a JavaScript code snippet to generate a random code verifier.
|
1 2 3 4 5 6 7 8 9 10 11 12 13 14 15 |
function generateRandomCodeVerifier() { const length = 128; // You can adjust the length as needed (minimum 43 characters). const characters = 'ABCDEFGHIJKLMNOPQRSTUVWXYZabcdefghijklmnopqrstuvwxyz0123456789-._~'; let codeVerifier = ''; for (let i = 0; i < length; i++) { const randomIndex = Math.floor(Math.random() * characters.length); codeVerifier += characters.charAt(randomIndex); } return codeVerifier; } |
- Create a SHA-256 hash of the
code_verifier, and then encode it as a Base64 URL string. This becomes yourcode_challenge
You can use the crypto.subtle API in modern browsers to achieve this. Below is javascript snippet showing how you can do it.
|
1 2 3 4 5 6 7 8 9 10 11 12 13 14 15 |
async function generateCodeChallenge(codeVerifier) { const encoder = new TextEncoder(); const data = encoder.encode(codeVerifier); const buffer = await crypto.subtle.digest('SHA-256', data); const array = Array.from(new Uint8Array(buffer)); const codeChallenge = btoa(String.fromCharCode(...array)) .replace(/\+/g, '-') .replace(/\//g, '_') .replace(/=+$/, ''); return codeChallenge; } |
Step 3: Authentication
Upon being redirected to the Keycloak login page, the user enters their credentials. Keycloak validates the credentials and generates an authorization code.
Step 4: Code Exchange
Once the user successfully authenticates, Keycloak redirects them back to your application’s specified redirect_uri along with the authorization code.
Your application must then exchange this code for an access token and possibly a refresh token by making a POST request to Keycloak’s token endpoint. This request should include the following parameters:
grant_type: Set this to “authorization_code.”code: The authorization code received from Keycloak.redirect_uri: The same redirect URI used in the initial request.client_id: Your application’s client identifier.code_verifier: The originalcode_verifierthat corresponds to thecode_challengeused earlier.
Keycloak validates the code_verifier and, upon success, returns an access token, an optional refresh token, and an ID token to your application.
Step 5: Resource Access
With the obtained access token, your application can access protected resources on behalf of the user. The resource server should validate the access token with Keycloak to ensure the user’s authorized access.
Step 6: Token Renewal (Optional)
If the access token expires, your application can use the refresh token to obtain a new access token without requiring the user to log in again.
By following these steps and parameters, web developers can successfully initiate the authentication flow using the Authorization Code Grant Type with PKCE in Keycloak. This process ensures secure authentication while protecting sensitive information.
Keycloak’s documentation and developer resources offer additional details and examples to further assist you in implementing this robust authentication flow in your web applications.
Sequence Diagram
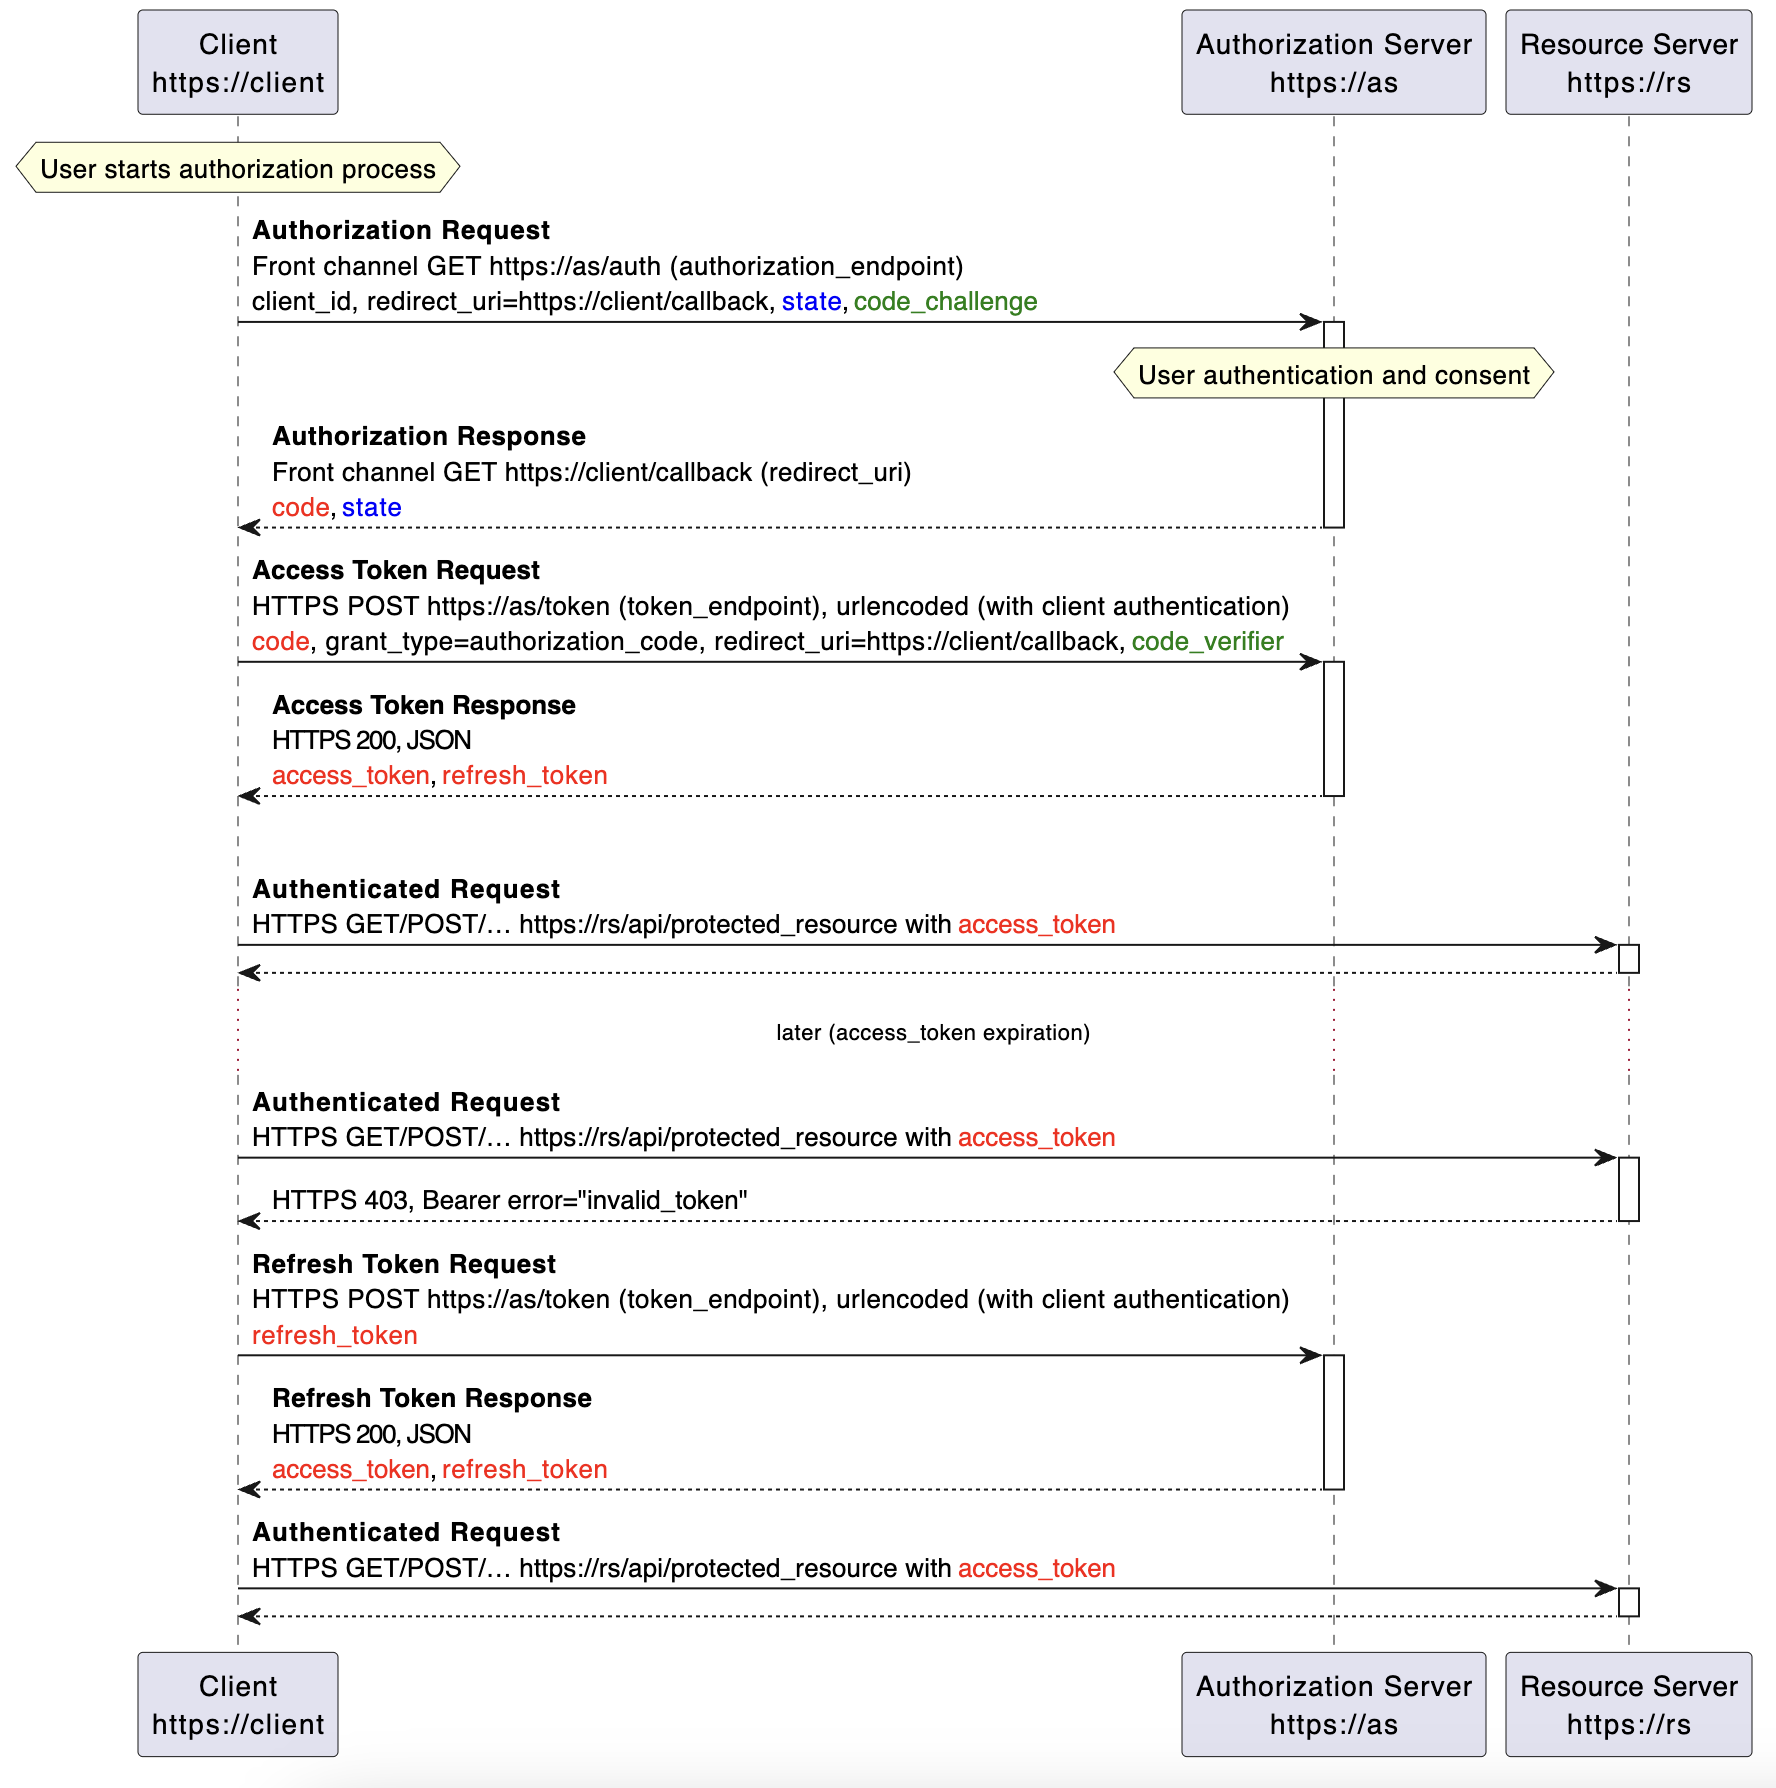
It is recommended to use a standard and reliable OAuth2 client library for authentication that abstracts and handles the above authentication steps internally and avoids possible human errors and resulting security loopholes.